
Tips and Advice for Anyone with Braces

Source
Intro
Thinking about getting braces? Or maybe you just got your braces and you don't know quite how to deal with them yet? Well you've come to the right place.
Braces are by far the best investment I have ever made. I've got a long way to go still but in the year and a half that I have had braces they already made a huge difference. People I went to high school with don't even recognize me anymore. But braces can be annoying and irritating and painful. Here are tips and advice I've learned over the last year and a half on how to deal with those braces and survive the years of a mouth full of metal.
Tips for Finding an Orthodontist
1: Get a Second Opinion
Usually your dentist will recommend an orthodontist or two that would be an excellent choice for your care, but you do not have to go with who they recommend. Before you start your treatment plan, the orthodontist will sit down with you and explain what kind of treatment they have in store for you. This includes how long they intend for you to wear the braces, whether or not you need surgery or teeth pulled, or if you need any special devices, etc.
If you do not like the plan being offered to you, get a second opinion. Go to the other orthodontist recommended by your dentist. Or ask friends and family who have had braces who they went to and what their experiences were. Find out who they recommend and see if a name doesn't come up twice. You can search for reliable reviews online until you find another orthodontist too.
At this point you might be thinking that you've already paid for all the x-rays and pictures of your teeth at the first doctor you visited and you don't want to pay twice for those. However, you can ask for copies of those x-rays and give them to a new expert for a second opinion, or you can have those documents sent directly to whoever you chose.
I highly recommend getting a second opinion, especially if you have a complicated case. The first orthodontist I saw said I would need at least two surgeries. They wanted to start off first by cracking open my upper palate right down the middle and then pushing the two halves apart with a rapid palate expander. Then they wanted to do a second surgery to close my open bite. Needless to say I was not happy with this idea.
So I got a second opinion. I am now a year and a half into treatment and my new orthodontist closed the open bite and got the expansion I needed on the top without any surgery at all. With the orthodontist I ultimately chose, even if I really don't have a choice I feel like I do have a choice in my treatment plan. I feel like my concerns are being heard. If you don't feel like your orthodontist is giving you a choice or not listening to you, like the professional I first saw, seek a second opinion. It may just be worth it.
2: Try a University Program
A lot of people choose to get braces through an orthodontics program at a local college. I did and it was probably one of the best decisions I have ever made. Getting braces through a college or university is so much cheaper than going through a private orthodontist. The estimated amount for treatment at the private facility I initially went to was $7500 total (not including the price of the surgeries), $2000 down payment, and $150 payment each month. My insurance would cover up to $2000 of that.
At the University program I ultimately chose, it is only $3600 total for everyone, no matter what kind of treatment you get, $600 down payment, and $125 a month. The down side with most university programs is that they do not accept insurance, but you can file your own claim with your insurance yourself and see if you can get reimbursed. But in my case, even with my insurance covering part of the charges at the private facility, the University is still a cheaper option for me. And my braces have definitely been worth more that $3600. Not only do I have braces, but I just got my 5th appliance, but they never asked me to pay more.
The cheaper price is not the only thing that makes a University program a better option. Some people might consider it a disadvantage that they are not being treated by an expert in the field, but by residents who are fresh out of college. In my experience, however, it has been a benefit. My orthodontist has never seen a case like mine, as I am an unusual case, but my doctor has access to all of the teachers at his school who have seen cases like mine and can offer my doctor guidance and assistance with my case. So not only do I have the opinion of my doctor, but the opinion of his teachers as well who have decades of experience working in orthodontics. It has definitely paid off for me and could for you too.
However, with a University program you may have less options. They will not offer invisalign and you will probably have to get metal braces as they are unlikely to offer clear braces.
Tips For Taking Care of Your Braces
3: Always Do What Your Orthodontist Says
Many patients, especially children, don't do what their orthodontist says because they don't think it's necessary, they just don't want to, or they are embarrassed. But not doing what your orthodontist asks you to do in between appointments will only prolong the treatment period and lengthen the amount of time you have to wear the braces.
So if your orthodontist wants you to clean your teeth a certain way, make sure you are doing it as often as you doctor wants. When your doctor tells you to avoid certain foods, like gum or pretzels, listen to them or you could damage your braces. If your orthodontist wants you to wear box elastics, rubber bands, or some sort of other device all the time except when you are eating or brushing your teeth, then make sure you are wearing it all the time. It may be an inconvenience or hindrance to your every day life, and yeah other kids might make fun of you, but if you want those braces to come off sooner rather than later, you should probably listen to your orthodontist.

Floss threaders. | Source
4: Take Advantage of Freebies
Most orthodontists will give you a bag of goodies after you get your braces on. This bag includes things like a toothbrush, gel to put on your any sharper edges that might be digging into the inside of your mouth, floss, a floss threader, bristles to clean under your braces, disposable picks, etc. When you run out of supplies, ask if you can have more.
My orthodontist clinic has an entire station devoted to these supplies and any patient can go and load up on what they need at any time. I have not bought a toothbrush since I started treatment, because every time I need a new one, I just pick one up there. Same with any of the other supplies I use.
Personally I don't use the gel, because I've never really needed it anywhere but my back teeth and it is pretty much impossible to get the gel to stick to your braces in the back. But I fully take advantage of all of the other freebies they offer.
5: Speak Up
If you are at the end of your appointment and your Doctor asks you if everything feels okay in your mouth, make sure you tell them the truth. What I mean is, say you have a wire that is kind of poking you in the cheek in the back, but it's not that uncomfortable. You are definitely going to want to ask you Doctor to fix it, because it may be weeks before your next appointment and during those weeks the problem is only going to get worse and become more painful. It might go from slightly uncomfortable to the wire is stabbing you in the mouth every time you eat or talk. So let them know before you leave.
It something feels loose, let them know. It may save you from having to make an extra appointment to get something fixed or replaced. Or if something is digging into your gums have them fix it before it really becomes painful. Don't let anything slide because when it comes to braces, the problem always gets worse over time. And don't worry about sounding whiny or like a complainer, I am pretty sure your orthodontist is used to it.
 and bristle attached to a handle (bottom).")
Baby brush (top) and bristle attached to a handle (bottom). | Source
6: Get in the Habit of Brushing Your Teeth Everyday
It takes a couple of weeks of doing something everyday for it to become a habit. So get in the habit of brushing your teeth at least twice a day everyday. Do it at the same time everyday so it becomes second nature. And don't miss a single day. If you miss just one day, you are more likely to continue missing more and more days of brushing your teeth. So make sure, every day after breakfast and before bed that you are brushing your teeth.
When you are brushing your teeth, a toothbrush will not be enough. If your orthodontist does not supply you one, invest in the two brushes in the picture above. One is a baby brush for brushing around your braces and the other is a bristle attached to a handle for brushing under your wire. Both are absolutely necessary when brushing. Usually, I brush with a toothbrush first to loosen and get rid off any big particles stuck in my braces. Then I use the baby brush to brush around my braces before finally using the bristle to get under the wire.
Follow up with a good mouthwash. Anything with alcohol in it will burn your mouth and irritate any sores or anywhere your braces have dug into the inside of your mouth. If you can find it, try instead ACT's mouthwash designed for braces. It's the best I've tried so far. It doesn't burn your mouth and this brand foams when you swish it around helping to loosen and get rid of any food stuck in your braces that brushing may have missed.
If you do not take good care of your braces, you will notice white spots starting to form around the metal. Those are cavities. They can form very quickly if you don't brush everyday. Your gums may become swollen and gross too if you don't brush regularly. This may delay your treatment, or if it gets bad enough may stop your treatment all together. So take good care of your teeth! Otherwise you're paying thousands of dollars to fix teeth that if you don't take care of will just fall out in a few years!
 and disposable bristles (right).")
Disposable toothpicks (left) and disposable bristles (right). | Source
7: Invest in a Waterpik
When you have braces, flossing is a pain in the butt. Usually your orthodontist gives you a kind of tool known as a floss threader. You have to put your floss through it, then literally thread it under your braces and through your teeth. It is a lot of work.
So instead, invest in a waterpik. Using a waterpik usually makes a watery mess, but it is less time consuming and easier to do then the process mentioned above. Plus using a waterpik will get all those food particles out of your braces.
8: Carry Disposable Picks
Whether it is disposable bristles or disposable toothpicks, make sure you carry them around with you all the time. Carry them in your purse, wallet, or backpack and take them everywhere. You can't always brush your teeth after you eat, but that doesn't mean food won't still get stuck in your braces. So carry disposable bristles or toothpicks to get rid of that unsightly food from your teeth in the bathroom or at a mirror at your locker before returning to public. This can save you a lot of embarrassment in the future. The picture on the right shows you the kind of things I am talking about. I get the disposable bristles from my orthodontist, but the disposable picks can be found at any pharmacy, such as Rite Aid, Walmart, Walgreens, etc.

Source
Tips for Eating With Braces
9: Always Toast Your Bread
This may sound like very weird advice, but it is actually extremely useful to know. This is something I learned the hard way: if you are going to eat bread, always toast your bread, especially if you are going to eat a sandwich. Bread is a very soft and mushy food, and when you bite into a sandwich, or a burger bun, the soft bread sticks to your teeth like glue. Literally just huge gobs of bread get stuck in your braces. It is a pain to get all of that bread out of your braces at once, because it doesn't come out as a chunk, it comes out in little pieces. It is very annoying. If you toast your bread first, you won't have this problem. So save yourself the trouble and toast your bread.
10: Chew on Your Back Teeth
Rather than tear into a sandwic or a burger, it is better to cut or tear your food into small pieces and then chew on your back teeth. This way not only is food less likely to get stuck in your braces in the front, it is less irritating to your mouth. If you chew on your back teeth, the inside of your lips isn't rubbing against your braces so it is less likely to get sore. You are also less likely to damage your braces and risk having another unscheduled appointment if you cut things up first. Plus it is just easier to chew with your back teeth.
11: Drink Lots of Water
There are two main reasons why you should drink water. The first reason is soda and juice can be very corrosive to your teeth and can easily cause cavities. So if you vow to drink only water you cut the risk of forming cavities. If you cut out all sugary drinks and only consume water you may also lose weight.
The second reason why I like to drink water after eating, is because you can swish the water around in her mouth to loosen up some of the larger chunks of food stuck in your braces. You can do this indiscreetly by swishing and spitting the water out into the sink, or discreetly by swishing it around in your mouth once or twice and then swallowing if you're say on a date and and don't want your date seeing you with food stuck in your braces. There is no guarantee swishing water will get all of the food out, but it can help.
12: Avoid Crunchy Foods
This is one your orthodontist will probably tell you. Crunchy foods can damage your braces. I still eat them anyway, but crunchy foods such as potato chips, Doritos, etc, can be a danger to eat. They easily get stuck under your braces. If you have an expander, or metal bands, or a bar running along your teeth, they can easily get stuck under the bar or expander, or in between the metal bands. Then it is not only annoying, but can be painful and hard to get out. Plus the pieces can be sharp and stab you in the mouth, while not always painful, it can be uncomfortable.
13: Invest in Soft Foods
After an adjustment, your teeth will be very sore and it will hurt to chew for a few days.Therefor it is wise to invest in softer foods that don't require chewing. Some of your options include protein or breakfast shakes and smoothies. I have literally gone a day or two just drinking smoothies and breakfast shakes, they are a lifesaver. Other options inclue yogurt, pudding, cottage cheese, ice cream, jello, applesauce, mashed potatoes, etc. Make sure you stock up before the appointment otherwise you are likely to just not eat for a few days, which is great for weight loss, but not a healthy choice. The following tip can also help you a lot with the problem of pain after an adjustment.
Other Tips and Advice
14: Tylenol
This tip will be a lifesaver: take Tylenol one hour prior to your appointment. Tylenol will be your best friend during this long process. Your orthodontist doesn't really want you to take Ibuprofen or Aspirin while you have braces. As my Doctor explained it to me, it is because Tylenol allows swelling which you need to move your teeth, while Ibuprofen and Aspirin do not allow swelling. I don't know why it is important, but it is. Taking Tylenol, therefore, an hour before your appointment will be a lifesaver.
During your appointment, your orthodontist is usually doing a lot of work on your mouth. Either putting in new devices, giving you your braces for the first time, putting in a new wire or just making routine adjustments. Adjustments hurt, horribly. So take Tylenol before your appointment and as often as you can after the appointment to keep from feeling the majority of the pain. Usually by the next day you will start to feel better.
15: Avoid Getting Hit in the Face
This may seem obvious, and it is, but it is harder than it seems to accomplish. Try, though, to do everything you can to avoid getting hit in the face. Not only can getting smacked in the face by an object damage your braces or loosen them, it hurts...a lot. My dog once hit me right in the mouth with his giant nose (I have a German Shepherd so he is a huge dog with a hard head) and it was quite painful. After my dog hit me in the mouth, my braces left a nice long cut from canine to canine on the inside of my mouth on the top and my bottom lip got caught in between my canines on the top and bottom resulting in a nice big cut and fat lip.
Thankfully the blow did not damage my braces, but it was not a pleasant experience. Unfortunately things like this are sometimes unavoidable.
16: Orajel
If you get a canker sore or if your braces are really digging into your mouth, put a little orajel where it hurts to sooth the pain. Wherever you apply orajel and the sore and area surrounding almost instantly goes numb. It is a weird feeling to say the least. Personally I have only used Orajel once and didn't like it. But if you are in pain go for it.
Note that orajel is not something you put on your teeth if they hurt, it is for irritated skin inside your mouth.
17: How to Fix Common Problems at Home
Did your wire come loose? Is it poking you in the cheeks or gums? Did your spacers pop out and you're not sure how to put them back in? Did your bracket break? Or are you unsure of how to make the gel stick to your teeth so a particular sharp edge stops rubbing into a sore spot?
Watch the video to the right from bracesquestions.com and they can help you solve some of the minor problems that pop up in between appointments. For major problems, or for problems that cannot be fixed from home, call your orthodontist. They will either tell you what you can do in the meantime or they'll have you pop real quick to get it fixed.

Source
Spacers are usually the first thing you get and they will mostly likely be the most painful part of the braces process. Don't let this scare you. After you experience the pain of spacers, nothing else compares and your braces won't seem that bad in comparison. All you gotta do is tough out those spacers for a week or so and it'll get better.
And don't forget to smile more! Braces are nothing to be embarrassed about! Your teeth may not be perfect yet, but they are getting there, so don't be afraid to show off your smile!
Sciatic Pain—Natural Treatments & Home Remedies
Sciatica, or pain along the sciatic nerve and in the lower back, can be overwhelming. It can send shooting or burning pain from the lower back, into the hip, and all the way to the feet. It hurts to sit, to walk, and even to lay in bed.
Sciatic pain can be caused by damaged discs, inflamed tissues surrounding the nerve, and a chronically tight piriformis muscle that compresses the nerve. Long-term compression can lead to nerve damage, so it's best to treat this early.
Once you have found the cause of your back pain, you can use the right natural treatments to find pain relief.
Note: I am not a doctor or physical therapist, although I have had chronic sciatica since I was a young teenager. I understand the frustrations when searching for pain relief.
Please see your doctor to identify the actual cause of your pain, and determine which of the following treatments are appropriate for you.

The right hip bone, external surface, showing the greater and lesser sciatic notches, separated by the ischial spine. | Source
What I Will Cover
Use the following links to jump to the section of this article you're interested in.
- What is sciatica?
- Natural pain relief - relaxation, ice and heat
- Gentle movement - key to sciatica relief
- Posture and ergonomics - walk, lift, sit and sleep with a balanced posture
- Alexander technique - posture correction
- Piriformis stretches - reduce compression on the sciatic nerve
- McKenzie exercises - designed to relieve back pain
- Physiotherapy exercises - stretches and ball work
- Yoga poses - relieve nerve pain
- Back strengthening yoga - prevent sciatica from returning
- Unproven therapies - acupuncture, TENS, traction and herbs

Sciatica can feel like your nerve is on fire | Source
What Is Sciatica?
Sciatica occurs when the sciatic nerve is compressed due to inflammation or physical damage. It can occur on one side only, or on both sides, and may cause numbness and weakness in addition to muscle and joint pain.
Sciatica can have a number of causes:
- bulging or herniated disc
- narrowing of the spinal column
- inflammation of the soft tissues in the surrounding areas
- short or spasming piriformis muscle in the buttock (piriformis syndrome)
Over 80% of people in industrialized countries will have lower back pain during their life. This is one of the greatest causes of employees being unable to work. Most acute sciatic pain cases recover within 6 weeks, however a small number develop chronic sciatica.1
A standard western medical treatment for back pain is paracetamol or low-dose non-steroidal anti-inflammatory drugs (NSAIDs), such as ibuprofen. However, they highly recommend that you keep moving, gently: no bed rest.
Medications commonly prescribed for sciatica work to calm the pain and inflammation in the short term, but they don't stop it from recurring.
One of the most popular books for back pain self-treatment by pain expert and posture specialist, Esther Gokhale. She delves into more detail about many of the areas I cover in this article, and explains how the spine and muscles should function.
Natural Relief for Sciatic Pain
Many natural and physical therapies, and simple lifestyle changes, can provide pain relief and prevent it from returning.
- A healthy diet improves your body's ability to heal. Use citrus fruits and juices, such as lime juice - vitamin C boosts your immune system, prevents serious illnesses, and reduces the swelling around the nerve.
- Proper posture, healthy weight, ergonomic working environments and an active lifestyle all play important roles in treating and preventing pain.
- Physiotherapy exercises may help recover and maintain range of movement in the spine and hips, and prevent the pain from recurring.
- Relaxation techniques help you manage and reduce the psychological impact of chronic pain.
Relaxing the Muscles Around the Irritated Nerve
Rest at regular intervals, in postures chosen to relieve pain. Intentionally relax all the muscles in your body in these positions:
- Lay on your stomach with a pillow or rolled towel underneath your hips.
- Lay on your stomach with one leg bent and out to one side - the first aid recovery pose. Put a pillow under the knee to remove any strain on your back.
- My favorite: Lay on your back with a pillow under your head. Rest your feet on a chair so that your knees are bent and your lower back is flat against the floor.
Heat, Ice, and Massage
- Ice: If you have acute pain after an injury, apply ice to the lower back for 10 minutes every few hours. Ice reduces inflammation and provides temporary pain relief in the first few days after your injury.
- Heat: If you have longer-term pain, apply heat to the lower back and hips to encourage circulation and tissue repair, relax the surrounding muscles and reduce pain. A hot bath or shower relaxes the muscles and calms the nerve.
- Menthol-and capsaicin-based sports rubs or plasters may provide short term relief of chronic back pain.
- Massage and spinal manipulation may provide some short term relief, but should only be performed on sciatica patients by qualified and experienced practitioners.

Massage cushion, home-made tennis ball massage device, heat pack, menthol rubs, relaxing essential oils and bath salts with wintergreen - to combat sciatica. | Source
Gentle Movement
- Staying active has been shown time and time again, to have better results than bed rest for back pain.1,2,3 Staying in one position or doing one activity for a long time makes back pain worse. Take regular breaks and move around.
- Walking gently with good posture can provide pain relief from acute back pain. When my sciatic flares: I stop, gently stretch my hamstrings, do some gentle standing twists, forward bends, and lightly massage the sore areas. I can then keep walking carefully until I get home to my trusty heat pack.
Posture and Ergonomics
- Correct posture and ergonomics: Use a balanced posture in all activities to prevent pain.
- Walking and standing: Use smooth, gentle and relaxed movements - tense muscles increase the pain. Stand tall, and make sure your lower back is not curved. Keep your buttocks tucked in.
- Carrying: Never carry a bag on one shoulder, or all the shopping bags in one hand. Distribute weight evenly on both shoulders, and in both hands. Use backpacks, not shoulder bags. My doctor and physiotherapist believe that my heavy, single-shoulder school bag was a trigger for the sciatica starting in my teens. I wish my school had allowed backpacks!
- Lifting, reaching, bending, and twisting: Avoid heavy lifting if possible. If you must lift something, don't bend over or twist your back. Use your knees to lift and your feet to turn. Avoid twisting when reaching for something above your head or below your waist. Try not to pick up children. Kneel down if you need to reach something low.
- Sitting: Use a chair which supports your lower back. Position your knees at the same level as your hips, with your feet flat on the ground. A lower back pillow, or rolled towel will support your lower back. Use the arms of the chair to help you sit or stand.
- Note: Constantly sitting tightens the piriformis muscle. Get up and stretch regularly. I prefer to sit with my feet up, sometimes with a towel or pillow under my knees.
- Driving: Avoid driving when the pain is severe. Use a pillow or lumbar roll to support the lower back and maintain a correct sitting posture.
- Sleeping: A firm mattress with one supportive pillow under your head encourages good sleeping posture. An extra, soft pillow between the knees may provide sciatic relief. Be careful not to twist or place strain on your back when getting into or out of bed.
Alexander Technique
The Alexander technique (for correct posture and movement), taught to back pain sufferers in a randomized trial, was shown to reduce and control their back pain symptoms.4
This technique is used by singers and musicians to maintain correct and healthy posture and can reduce sciatic pain. The best way to learn the Alexander technique is to find a teacher who will train you in a series of classes, and will give you additional exercises to do at home.
McKenzie Exercises
Designed by physiotherapist Robin McKenzie in the 1950s to treat a variety lower back problems, including herniated discs and sciatica, the McKenzie exercises can relieve lower back and leg pain.
Your physiotherapist or specialist will help you perform the press-up exercises safely, showing your the correct form. Many back pain patients report fantastic results with leg-pain reduction, even in the first week, when exercises are done regularly.
Tip: When your pain is better under control, the gentle press-up can be strengthened into the yoga cobra pose.
Piriformis Stretch
If your pain is caused by pressure from a short or cramped piriformus muscle (the muscle that runs into your hip and across the buttock) you may have piriformis syndrome. This syndrome is diagnosed by ruling out all spinal disc and bone problems.
Piriformis syndrome may appear on a nerve conductance test. Electrical signals are slower when the nerve is strangled by the piriformis muscle.
Runners, cyclists and rowers—anyone who bends forward at their hips a lot and overuses these muscles—is at risk of developing back and leg pain.
- Lay on your back with one foot on a wall, knee bent at right angles. rest the other foot just above the bent knee on your thigh, and hold for 60 seconds and relax.
- Repeat on the other side.
If you don't feel enough of a stretch, move closer to the wall bringing your knee closer to your shoulders.
Physiotherapy Exercises
Physiotherapy exercises should be done daily to relieve back pain, correct improper posture, and strengthen the back and core abdominal muscles.
- Use a yoga mat or folded blankets to make the surface softer, especially when lying on your back.
- Balance balls are great for strengthening core abdominal and back muscles, and can be used as a chair when traditional seats hurt.
- Choose a good quality anti-burst balance ball that is the right size for you.
- If you want to do strength training with your ball, look at the max weight. You'll need a strong ball!
Exercises and Stretches
- Single knee to chest: Lie on your back, legs straight, with a pillow under your knees. Pull one knee into your chest, feel the stretch through the hip, buttock and into the back. Hold for 30 seconds, and repeat on the other side. Repeat this many times.
- Back massaging circles: Lie on your back, both legs gently pulled towards chest. Circle your knees so that the lower back is gently massaged. This may hurt significantly in the beginning, so be gentle. You can do this with a balance ball under your lower calves.
- Core muscle contractions: Lie on your back, legs straight, with a pillow under your knees. Contract only the deep muscles that stabilize the spine, breathe as normally and as relaxed as possible. Hold for 30 seconds then release. Repeat many times. This is surprisingly difficult to do!
- Lying twist: Lie on your back, knees bent, feet flat on the floor. Stretch your arms at shoulder height, away from your body. Drop your knees to one side, and turn your head to the other. Be gentle! Hold for 30 seconds, and repeat on the other side.
- Balance ball bridge: Lie on your back with a balance ball under your calves. Keep your shoulders and neck on the ground and raise your pelvis so that your back and upper legs are in a straight line. Drop your pelvis slowly to the ground. Repeat 10-15 times. If you don't have a balance ball, use a chair under your calves.
- Balance ball diagonal arm/leg raise: Lie with your stomach on the balance ball, legs and arms on the ground, shoulder width apart. Raise your right arm and left leg horizontal with the floor. Hold for 5 seconds, then release and repeat on the other side. Repeat these 10-15 times. Do this exercise on your hand and knees if you don't have a balance ball.
Yoga Poses
Many gentle yoga poses can relieve sciatic pain. Plus there are many other stretching and back strengthening poses to prevent it from reoccurring.5,6
Important: Check with a doctor or physiotherapist, start gently and relax. Never strain to hold a pose in yoga - it is not a competition. Warm up and cool down with light aerobic movements and gentle stretches to avoid injury.
If you find yoga too strenuous or painful, tai chi may be more appropriate.
Yoga Poses
- Cat-cow pose relieves pressure and increases mobility in the back (marjariasana).
- Standing forward bend loosens the hips, stretching the hamstrings and lower back (uttanasana).
- Head-to-knee pose stretches the lower back and hips (janu sirsasana).
- Big-toe pose stretches the hamstrings and relieves lower back pain (supta padangusthana).
- a butterfly leg pose opens and loosens the hips (baddha konnasana).
- Fire-log pose opens the hips (agnistambhasana).
- Lower back twist loosens the back muscles (bharadvajasana).
- Sage's pose loosens the back muscles (marichyasana).
The Best Yoga Stretches for Low Back Pain
The following yoga demonstration puts my favorite go-to stretches into a gentle flow. These are great for sciatica caused by cramped muscles and piriformis syndrome.
Back-Strengthening Yoga
Be careful when attempting the strengthening poses. If at any time your nerve twinges, stop, stretch gently and relax.
- Extended side-angle pose stretches the outside of the leg and chest, and strengthens the back (utthita parsvakonasana).
- Warrior pose variations strengthen the legs and lower back (virabhadrasana).
- Cobra pose strengthens the back, but be careful not to over-stretch (bhujangasana).
- Downward-facing dog lengthens and strengthens the back and arms (adho mukha svanasana).
Unproven Therapies
Many therapies have been suggested for sciatic pain, but few have been proven to work scientifically.
Acupuncture, acupressure, herbs, TENS, ultrasound, and traction have had mixed or poor results in studies, and are not usually recommended by doctors. Most of these physical therapies aren't likely to worsen your condition, but check with your doctor before trying one.
If you do find an alternative therapy that does provide relief, then continue to use it!
Be aware that herbs (both eastern and western) are processed in your body. Make sure the ingredients are not dangerous to your kidneys, liver, stomach, and that you aren't allergic to anything.
Avoid back braces—they have longer-term drawbacks, such as encouraging poor posture and weakening muscles.1
Famous People with Sciatica
Did you know that the following famous people have sciatica?
- Debbie Allen - American dancer and choreographer.
- James Cagney - American stage and film actor.
- Duncan Ferguson - Scottish ex-footballer who played for Everton and Newcastle United.
- Eileen Joyce - Australian concert pianist.
- Gabby Logan - Welsh TV presenter on the BBC, and ex-gymnast.
- Bela Lugosi - Hungarian actor, famous for playing Dracula on stage and in film.
- Rosa Mota - Portuguese marathon runner and gold medalist.
References
- Cost Action B13 - Low back pain: guidelines for its management, European Commission Research Directorate General, accessed March 2012.
- Advice to rest in bed versus advice to stay active for acute low-back pain and sciatica, K.T. Dahm, et.al., Cochrane database, June 2010, 16:(6)
- Guideline update: what's the best approach to acute low back pain? S.M. Bach, et.al., Journal of Family Practice, December 2009, 58(12):E1
- Randomised controlled trial of Alexander technique lessons, exercise, and massage (ATEAM) for chronic and recurrent back pain, P. Little, et.al, British Medical Journal, 2008, 337:a884
- Yoga Journal - Therapeutic Focus - Sciatica
- Yoga Learning Center
What Types Of Doctors Treat Patients With Pulmonary Embolisms (Blood Clots in the Lungs)
Creating your medical team to treat your pulmonary embolism
Pulmonary embolisms are very dangerous and recovery from one will take a diverse medical team. The team of medical professionals that you will work with will change as you move through diagnosis to recovery. This article will cover the large variety of people that a pulmonary embolism patient will meet along the healing journey.
Many people with a pulmonary embolism do not get to choose the doctors that initially treat their embolisms. Because pulmonary embolisms are very dangerous and often lethal many people start their treatment in an emergency room or ambulance. While you often can't select who works with you in the emergency room, it is good to know about the different specialties that work with patients with pulmonary embolism. Each type of professional has a different skill that can be added to recovery. As a patient, it is recommended that you learn about the different professionals so that you can pick out a winning team to continue your treatment throughout recovery and beyond. Depending on your needs and symptoms your team may look very different from someone else's team. This article will be a summary of some of the specialists and professionals that you may encounter.
Pulmonary Embolism Recovery
Pulmonary embolism recovery is a long, process. If you need additional information about recovery, please visit my Hub on this topic. It chronicles my experience with recovery and goes over the stages of recovery. It also has a very active comments section with over 300 entries from other people who have experiences with pulmonary embolism treatment and recovery.
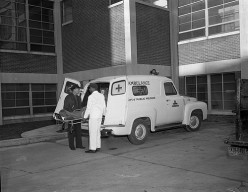
Emergency medical services - first line of care for pulmonary embolism
Many people do not have any signs of a pulmonary embolism until it is a life threatening situation. These patients may collapse or have symptoms that are severe enough to warrant calling 911 for an ambulance. This group will work with an EMS person. This medic will be responsible for life saving measures and/or stabilization until the patient reaches the hospital. EMS may contribute to diagnosis.
If you have a condition that predisposes you to clotting or if you have a history of clots it is reccomeded that you wear a medical ID so that EMS will know to take measures to treat clots immediately. This bracelet can also alert EMS as to any anti coagulation therapies and emergency contacts.
The emergency room doctor
In the emergency room you will meet a number of different medical professionals. Once you have been checked in and have gone through triage you will likely be assigned to an emergency room doctor. This is an actual type of doctor. Emergency room doctors have to have a broad base of knowledge, be able to handle the serious, fast pace environment, and have special emergency medical training. This doctor will be responsible for making sure that you are stable, prescribing tests and evaluations, and giving you your final diagnosis. In order to get the best care possible it is recommended that you call your primary care physician while you are in route to the emergency room. Your doctor can share information with your emergency room physician. This information will help in your diagnosis and treatment. Once you are stable and have a diagnosis you will either be sent home or you will be assigned to a ward. Make sure to get all of your files from ER. I suggest getting discharge instructions, any studies or films, and diagnosis notes. This information may be useful further down the road.
How a CT scan works
Radiology technician
Spiral CT scans with contrast dye have become the most common way to diagnose pulmonary embolisms. The person who will take your chest xray and perform your CT scan will be a radiology technician. These individuals have had special training in a variety of medical imaging techniques. They can not diagnose your PE nor can they prescribe a CT scan. These jobs are left to the emergency room doctor and the radiologist who will read the CT scan.
Pulmonary embolism CT scan with contrast dye
Radiologist
The radiologist will view your diagnostic images and diagnose what he or she sees in the films. A radiologist is a medical doctor who specializes in interpreting CT scans and other types of medical images. This diagnosis will then be passed on to your ER physician or another physician who is treating you.
Hospitalist
A Hospitalist is a doctor that is very similar to a general doctor, family practitioner, internist, or any other doctor that practices in a broad range of conditions. The hospitalist works in a hospital and makes rounds to all of the patients in the hospital. This doctor will collaborate with any specialists, nurses, or therapists that may be working with your case. This doctor will also help to plan your discharge and forward any information to your typical doctor. Your hospitalist will be your case manager for your hospital stay and will help you understand and treat your condition.
Ultrasound Test for Clots
Pulmonologist
A pulmonologist is a doctor that specializes in diseases and disorders of the lungs. The type of doctor can evaluate your lungs after a clot to assess any lung damage. This doctor will also help you to determine the cause and treatment of any residual breathing problems during recovery. Many people with clots never see a pulmonolgist as the clots, not the lungs, are the main problem. If there are continued problems with breathing, a pulmonolgist is the specialist to ask for.
Hematologist
Hematologists are trained in diagnosing and treating issues and disorders of the blood. This can be a very important doctor to add to your team. Many people with clots do not know why they developed clots. A hematologist can test for clotting conditions that may have contributed to your clots. These tests may help you to discover why you have a pulmonary embolism and will help you to determine the length of time that you will remain on warfarin.
A hematologist is also a great person to ask about any of your anticoagulation therapy concerns. Warfarin (Coumadin) and Lovenox will both be familiar to this specialty and will be a huge help in pin pointing any problems that you may be having staying within your therapeutic range.
If you have a clotting condition, your hematologist will help you to decide if you wish to remain on warfarin or another anticoagulant. She or he will also help you determine how to fly safely, have surgery, have a baby, use contraception, or any other life issues that may come up that may cause clotting or bleeding. Your hematologist will be useful for the rest of your life. Hang on to that phone number as he or she is the one to call whenever you are worried.
Echocardiogram
Cardiologist
A cardiologist works on the heart. Unfortunately, pulmonary embolisms frequently cause heart damage due to the amount of work the heart must do to push blood past the blocked areas in the lungs. A cardiologist will often perform an echocardiogram (heart ultrasound) to get an image of the heart. This image will show if the heart has become enlarged.
(Depending on the type of echocardiogram, the cardiologist may be able to check for holes in the heart wall. These holes are fairly common. The problem is that the holes can allow clots to easily pass through the heart. This can allow clots to bypass the lungs and enter the brain. If you have any medical history that suggests that this may be an issue, speak to the cardiologist or hospitalist that is arranging this test.)
The cardiologist will also monitor your EKG, blood pressure, and your heart rhythm to ensure that everything is healthy, or, at the very least stable and healing. Having a healthy heart is one large step to going home safely from the hospital after a pulmonary embolism.
Phlebotomist
The phlebotomist is the person who draws and runs tests on your blood. After a pulmonary embolism you will become very familiar with this person. Blood tests are vital to your diagnosis. After you are diagnoses, you will receive a blood draw about every 2 hours for the first few days. This ensures that your levels of heparin are correct and will also help you to obtain a therapeutic level of warfarin. Often you will see a number of different phlebotomists as many different ones typically work at any given time.
IV Nurse
You will see a lot of nurses during your stay. One particular type may be useful to you, the IV nurse. This nurse has specific training and tools to assist in starting difficult IV lines. Some people are very difficult to get an IV on. Also, after numerous days in the hospital, veins tend to get used up. If you have a difficult time with IVs, ask for this special nurse.
Nurse
Nurses will be everywhere during your hospital stay and at your doctors' offices. Nurses were one of the most helpful medical personal that I got to know during my hospital stay. This group is well trained in bedside manner. They can interpret doctor speak for you and recommend where to get resources or information. If you would like to see a specialist your nurse can relay this information to a doctor. Your nurse may also be responsible for helping you with toilette activities, dressing, and general comfort. The nurse can also train you on Lovenox injections. If you are in pain or having problems breathing you will want to talk to a nurse. As you can see, nurses are indispensable.
Nurse Practitioner
A nurse practitioner has much of the same training as a generalist doctor. Each state has different rules about what a nurse practitioner can do. Often they are able to treat and diagnose simple illnesses. A nurse practitioner may be the person who manages your warfarin after discharge. Also, many doctors' offices are using them for intake and simple care. Don't be surprised if one takes care of you at some point. The great thing about this group is that they are well trained in bedside manner. They can make sense of a lot of doctor jargon and are very skilled at putting a patient at ease.
Social Worker
Social workers understand the workings of benefit systems and available programs for individuals. You may meet one when discussing how you will be paying for care or how to navigate your insurance. Sometimes they can be useful in planning discharge, arranging home services, and obtaining uncommon medications like Lovenox.
Pharmacist
After a pulmonary embolism you will be on a number of medications. You want to make sure that your pharmacist is aware of all the medications that you take both new and old. If you use vitamins or supplements, talk to your pharmacist about these as well. Your pharmacist is trained in medication: how to take it, when to take it, side effects, and reasons for each drug. If you have problems this is who you will call. The hospital will also have one on staff. If you need help or have questions about medication or its side effects this is who you will want to find.
Warfarin is a tricky drug. Pharmacists will be able to tell you how to cope with its side effects, what to expect, and how to cope with missed doses. If you have a stomach bug or change in medication the pharmacist should be notified so that you can determine the best plan for future doses. Many coumadin clinics have a staff pharmacist that manages patients. If you can find a clinic that has you see a pharmacist that specializes in anticoagulation you are very lucky.
Speech Language Therapist
A speech language therapist is rarely on a pulmonary embolism team but some people find one to be useful. This type of professional can train you in breathing exercises that can help you speak and exert yourself again with ease.
Primary Care Physician
This is a doctor with many names: generalist, internist, family practitioner... This is the person that will coordinate and interpret your alphabet soup of doctors, tests, and medications. Once you are out of the hospital this person will make any referrals that you need for specialists. This person often interprets findings and can give you opinions about what the specialists say about a test result or treatment. many insurance companies require you to have one of these doctors. This doctor often can manage your warfarin, although many people find that a coumadin clinic is more skilled in this area.
Nurse Line
Your insurance may have a nurses hotline for you or may assign you a case manager. Use this service whenever you are overwhelmed or confused. Often they are staffed 24 hours a day. When you don't feel like you have all of the answers, call the nurse and ask. This is an underused, very useful service.
Councillor or Psychologist
A lot of mental stress and damage happens with a clot. Many people have survivor's guilt or suffer PTSD. A year of recovery can be very hard to cope with. One of the best resources one can have is counseling. Don't underestimate it or think it makes you a wimp. You just had a life threatening condition, you may want some extra coping skills.
Conclusion
Please read my other information about pulmonary embolism recovery. I have a number of sites that will be of use to you:
- Pulmonary Embolism Recovery
- Warfarin Information
- Clotting Conditions
- Female Concerns
- Travel Information
- What Tests Should You Have
- Factor V Leiden
- Time on Coumadin
- Different Types of Anticoagulants
and others...
If you have questions or think of a recovery team member that I missed, let me know. Also, remember, I am not a doctor, so contact one with any problems you may have.


Emoticon